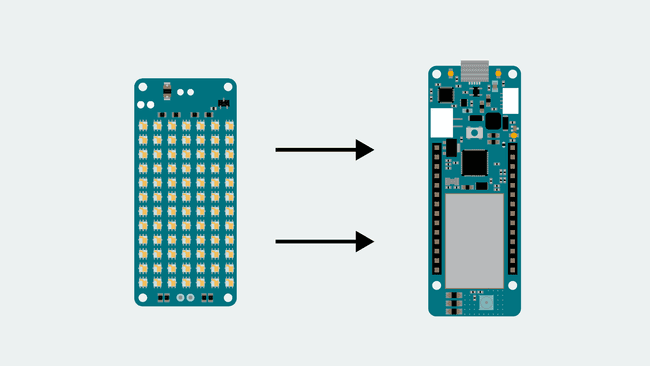
MKR RGB Shield Fill and Stroke
Learn how to draw rectangles on the shield, using fill and stroke functions.
Introduction
In this tutorial, we will test out some pretty basic features, using the MKR RGB Shield, the Arduino_MKRRGB and ArduinoGraphics library.
The features we will focus on are
fill()stroke()rect()Note: The MKR RGB shield is designed to be used with the MKR family board. This includes the MKR Zero, MKR WiFi 1010, MKR FOX 1200, MKR WAN 1300/1310, MKR GSM 1400, MKR NB 1500 and MKR Vidor 4000.
Goals
The goals of this project are:
- Install the required software for the MKR RGB Shield.
- Learn how to use the Arduino_MKRRGB and ArduinoGraphics library.
- Create and color a stroke outline.
- Create and color a filled rectangle.
Hardware & Software Needed
- Arduino IDE (online or offline).
- Arduino_MKRRGB library installed.
- ArduinoGraphics library installed.
- MKR RGB Shield (link to store).
- Arduino MKR family board (link to store).
Get to Know the Libraries
There are several fun and clever ways of making the most out of your MKR RGB Shield. In this tutorial, we will take a look on how to use the
fill()stroke()rect()Including the Libraries
Every time we want to use the MKR RGB Shield, we will need to include the Arduino_MKRRGB and ArduinoGraphics libraries. This is simply done by including them at the top of a sketch, as such:
1#include <ArduinoGraphics.h>2#include <Arduino_MKRRGB.h>Initialization
Initializing the library is done by using the command
MATRIX.begin()101MATRIX.begin();2 MATRIX.brightness(10);Begin and End Draw
Every time we want to draw something new on the MKR RGB Shield, we use the functions
beginDraw()endDraw()endDraw()1MATRIX.beginDraw();2 //paint a pretty picture3 MATRIX.endDraw();Fill and Rectangle
The
fill()rect()1MATRIX.fill(r, g, b); //color2 MATRIX.rect(startX, startY, width, height); //coordinatesLooking at the two first parameters,
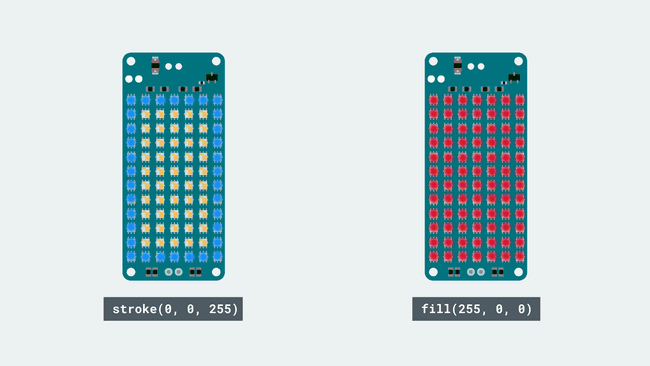
startXstartYwidthheight1MATRIX.fill(255, 0, 0); //red color2 MATRIX.rect(0, 0, 5, 2); //5x2 rectangle starting at 0,0With the code above, a red rectangle with the dimensions of 5x2 pixels will appear on the matrix.
Stroke
The
stroke()stroke()1MATRIX.fill(255, 0, 0); //red color2 MATRIX.stroke(0, 0, 255);3 MATRIX.rect(1, 1, 5, 2); //5x2 rectangle starting at 0,0We can also use the stroke, without the fill, so we only get the outline of a rectangle.
Circuit

Programming the Board
We will now get to the programming part of this tutorial.
1. First, let's make sure we have the drivers installed for the board we are using. If we are using the Web Editor, we do not need to install anything. If we are using an offline editor, we need to install it manually. This can be done by navigating to Tools > Board > Board Manager.... Here we need to look for the Arduino SAMD boards (32-bits Arm® Cortex®-M0+) and install it.
2. Now, we need to install the libraries needed. If we are using the Web Editor, there is no need to install anything. If we are using an offline editor, simply go to Tools > Manage libraries.., and search for Arduino_MKRRGB and ArduinoGraphics and install them.
3. These are some of the core functions of this sketch:
- this class is used for all Arduino_MKRRGB functions.MATRIX
- initializes the libraryMATRIX.begin()
- begins a drawing session.MATRIX.beginDraw()
- ends a drawing session.MATRIX.endDraw()
- no stroke used.MATRIX.noStroke()
- no fill used.MATRIX.noFill()
- sets the color of the stroke.MATRIX.stroke(r,g,b)
- sets the color of the fill.MATRIX.fill(r,g,b)
creates a rectangle.MATRIX.rect(startX, startY, width, height)
- sets the maximum height of the matrix.MATRIX.height()
- sets the maximum width of the matrix.MATRIX.width()
- clears the entire matrix.MATRIX.clear()
The full code for sketch can be found in the snippet below. Upload the sketch to the board.
1#include <ArduinoGraphics.h> // Arduino_MKRRGB depends on ArduinoGraphics2#include <Arduino_MKRRGB.h>3
4void setup() {5 // initialize the display6 MATRIX.begin();7 // set the brightness, supported values are 0 - 2558 MATRIX.brightness(10);9}10
11void loop() {12
13 // outline a blue rectangle14 MATRIX.beginDraw();15 MATRIX.clear();16 MATRIX.noFill();17 MATRIX.stroke(0, 0, 255);18 MATRIX.rect(0, 0, MATRIX.width(), MATRIX.height());19 MATRIX.endDraw();20
21 delay(1000);22
23 // fill a green rectangle24 MATRIX.beginDraw(); 25 MATRIX.clear();26 MATRIX.noStroke();27 MATRIX.fill(255, 0, 0);28 MATRIX.rect(0, 0, MATRIX.width(), MATRIX.height());29 MATRIX.endDraw();30
31 delay(1000);32}Testing It Out
After we have uploaded the code to the board, it will immediately start blinking between a filled red rectangle and a blue stroke only rectangle.

In the code, we used the functions
MATRIX.width()MATRIX.height()Troubleshoot
If the code is not working, there are some common issues we can troubleshoot:
- You have not mounted the MKR RGB Shield on top of an Arduino MKR board.
- You have not installed the Arduino_MKRRGB and ArduinoGraphics library.
Conclusion
In this tutorial, we have gone through some basic functions that are needed to get started with the MKR RGB Shield. We learned how to create rectangles and change their fill and stroke, as well as how to change their color.
Feel free to explore the Arduino_MKRRGB and ArduinoGraphics libraries further, and try out some of the many cool functions.
Suggest changes
The content on docs.arduino.cc is facilitated through a public GitHub repository. If you see anything wrong, you can edit this page here.
License
The Arduino documentation is licensed under the Creative Commons Attribution-Share Alike 4.0 license.